Da Vinci Resolve: The Ultimate Guide for Beginners
Da Vinci Resolve is one of the most powerful and versatile video editing software available today. It is used by professionals in Hollywood and independent filmmakers alike due to its comprehensive suite of tools for editing, color correction, visual effects, motion graphics, and audio post-production. In this guide, we will take you through the basics of Da Vinci Resolve, helping you to get started and understand the key features that make it a standout choice for video editing.
Getting Started with Da Vinci Resolve

Installation and Setup
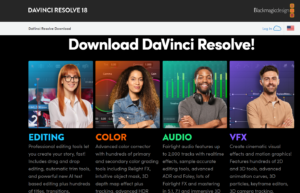
- Download: First, you must download Da Vinci Resolve from the Black Magic Design website. There are both free and paid versions available. The free version is quite powerful and sufficient for most beginners.
- Installation: Follow the installation instructions for your operating system. Da Vinci Resolve is available for Windows, macOS, and Linux.
- Initial Setup: Upon launching Da Vinci Resolve for the first time, you will be prompted to set up your project preferences, including resolution, frame rate, and other settings. These can be adjusted later as needed.
Interface Overview

Da Vinci Resolve’s interface is divided into several pages, each designed for a specific aspect of the post-production process. The primary pages are:
- Media: For importing and organizing your media files.
- Cut: A streamlined, fast-paced editing environment designed for quick turnarounds.
- Edit: The traditional non-linear editing page with a timeline and advanced editing tools.
- Fusion: For visual effects and motion graphics.
- Color: For advanced color grading and correction.
- Fair light: For audio post-production.
- Delivery: For exporting your final project.
Importing Media
To start a project, you need to import your media files. This is done on the Media page:
- Media Pool: The Media Pool is where all your imported files are stored. You can import files by dragging and dropping them into the Media Pool or by using the Import command.
- Bins: Organize your media into bins for better management. For example, you can create bins for different scenes, types of footage, or asset categories.
Basic Editing

The Cut Page
- Source Tape: Allows you to view all your clips as a single tape for easy navigation.
- Smart Insert: Automatically inserts clips at the right point on the timeline.
- Trim Edit: Tools for trimming and adjusting your clips efficiently.
- Fast Review: Plays back your timeline at an accelerated speed for quick review.
The Edit Page
For more detailed and complex editing, you will use the Edit page. Here are some of the essential tools and features:
- Timeline: The central part of the Edit page where you arrange your clips. You can have multiple video and audio tracks.
- Toolbar: Contains tools for selecting, cutting, slipping, and other editing functions.
- Inspector: Provides detailed controls for the selected clip, such as transform, cropping, and compositing options.
- Effects Library: Includes transitions, titles, generators, and effects you can apply to your clips.
Basic Editing Techniques
- Cutting Clips: Use the Blade tool (shortcut B) to cut clips on the timeline.
- Trimming: Trim clips by dragging their edges or using the Trim Edit mode (shortcut T).
- Transitions: Add transitions between clips by dragging them from the Effects Library to the timeline.
- Titles: Add titles by dragging them from the Effects Library to the timeline and customizing them in the Inspector.
Advanced Features
Fusion for Visual Effects
Fusion is Da Vinci Resolve’s powerful visual effects and motion graphics tool. Here are some basic concepts to get you started:
- Nodes: Fusion uses a node-based interface where each node represents a different effect or operation. Nodes are connected to create complex visual effects.
- Compositing: Combine multiple video layers, images, and effects to create composite shots.
- Animations: Create animations using key frames to change the properties of nodes over time.
Color Grading
The Color page in Da Vinci Resolve is renowned for its advanced color grading tools. Here are the basics:
- Primary Color Correction: Adjust the overall color balance, exposure, and contrast of your footage using the primary color wheels.
- Secondary Color Correction: Isolate and adjust specific colors or areas of your image using qualifiers and power windows.
- Scopes: Use scopes like the waveform, vector scope, and histogram to accurately monitor and adjust your color corrections.
- LUTs: Apply Look-Up Tables (Cuts) to achieve a specific look or style.
Fair light for Audio
The Fair light page is a complete audio post-production environment. Here are some key features:
- Tracks: Manage multiple audio tracks, including dialogue, music, and sound effects.
- Mixing: Use the mixer to adjust the volume, pan, and effects of each track.
- Effects: Apply audio effects like EQ, reverb, and compression to enhance your audio.
- ADR: Perform Automated Dialogue Replacement (ADR) to replace or add dialogue.
Exporting Your Project
Once you have completed your edit, color grading, and audio post-production, it’s time to export your project:
- Deliver Page: The Deliver page provides options for rendering and exporting your final project.
- Render Settings: Choose your desired format, codec, and resolution. Popular formats include MP4, MOV, and various professional codecs.
- Render Queue: Add your project to the Render Queue and start the rendering process.
Tips and Best Practices
Organize Your Project
- Bins: Keep your Media Pool organized with bins for different types of media.
- Timelines: Use multiple timelines for different sequences or versions of your project.
- Labeling: Label your clips and timelines for easy identification.
Learn Keyboard Shortcuts
Da Vinci Resolve has a plethora of keyboard shortcuts that can significantly speed up your workflow. Take the time to learn the most common ones, such as:
- B: Blade tool
- T: Trim Edit mode
- Ctrl/Cmd+S: Save project
- Ctrl/Cmd+Z: Undo
Use Proxy Media
Working with high-resolution footage can be demanding on your system. Use proxy media to create lower-resolution copies of your clips for a smoother editing experience. You can switch back to the original high-resolution media for final rendering.
Take Advantage of Tutorials and Community
Da Vinci Resolve has a large and active user community. There are numerous tutorials available online, both free and paid, that can help you master the software. Black Magic Design also provides detailed documentation and training resources.
Conclusion
Da Vinci Resolve is an incredibly powerful tool for video editing, color grading, visual effects, and audio post-production. While it might seem overwhelming at first, taking the time to learn its features and workflows will pay off in the long run. Start with the basics outlined in this guide, experiment with different tools and techniques, and soon you’ll be creating professional-quality videos with ease.
Whether you are a beginner or an experienced editor, Da Vinci Resolve has something to offer. Its combination of powerful features, intuitive interface, and robust community support makes it an excellent choice for any video production project.
